DIY Brake Pad Replacement: Step-by-Step Guide
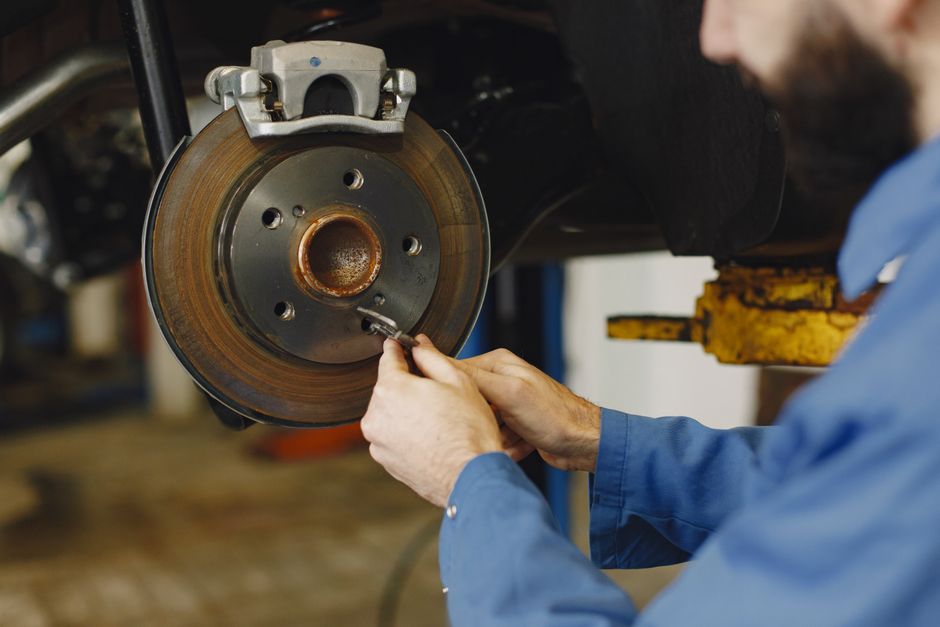
Replacing brake pads is a common maintenance task that can be performed in a home garage with the right tools and a methodical approach. This guide outlines the process from preparation to completion, emphasizing safety and correct technique. It is intended for informational purposes, and individuals should assess their own comfort level and consult a professional when uncertain.
Brake systems vary across vehicle makes and models, so always refer to the specific service manual for your vehicle. The steps provided here offer a general framework, but exact procedures, torque values, and component designs may differ. Working on brakes requires attention to detail and a commitment to following established protocols.
Before beginning, ensure you have a safe working environment. Use jack stands, wear eye protection, and work on a flat, solid surface. Never rely solely on a jack to support the vehicle. With proper preparation, the task can be completed efficiently, but it is essential to prioritize safety over speed.
Tools and Materials Needed
Gathering the necessary tools and materials before starting can streamline the process and reduce interruptions. A basic set of hand tools is often sufficient, but some specialized items may be required depending on the vehicle. It is advisable to consult the service manual for any unique tools or specifications.
- Socket set with various sizes
- Torque wrench
- Jack and jack stands
- Lug wrench
- C-clamp or brake caliper piston tool
- Brake fluid (if needed)
- Brake cleaner
- New brake pads
- Anti-seize lubricant
- Wire brush or sandpaper
- Safety glasses and gloves
Having a torque wrench is critical for tightening fasteners to the manufacturer’s specifications. Over-tightening or under-tightening can lead to component failure or unsafe driving conditions. Additionally, a brake caliper piston tool may be necessary for rear brakes with integrated parking brake mechanisms.
It is also wise to have a container for used brake fluid and a rag for cleanup. Brake fluid is corrosive and should be handled with care. Always dispose of used fluids and old parts in accordance with local regulations.
Preparation and Safety
Before lifting the vehicle, park it on a level surface, engage the parking brake, and chock the rear wheels if lifting the front. Loosen the lug nuts slightly while the vehicle is on the ground, as this is easier than when the wheels are off the ground. Once lifted, secure the vehicle with jack stands at the manufacturer’s recommended lift points.
Remove the wheel to access the brake caliper and rotor. Inspect the brake components for wear or damage. If the rotor is heavily scored, warped, or below minimum thickness, it may need to be replaced or resurfaced. This guide focuses on pad replacement, but rotor condition should be evaluated.
Safety is paramount when working under a vehicle. Never place any part of your body under a vehicle supported only by a jack. Use jack stands and ensure they are positioned correctly. Wear gloves and eye protection to avoid contact with brake dust, which can be harmful.
If at any point you are unsure about a step, consult a professional mechanic. Brakes are a critical safety system, and improper installation can lead to accidents. It is better to seek help than to risk a mistake.
Step-by-Step Brake Pad Replacement
The following steps describe a typical brake pad replacement for a disc brake system. Remember that specific procedures may vary, so always refer to your vehicle’s service manual.
- Remove the caliper bolts. These are usually located on the back of the caliper and may require a socket or hex key. Keep the bolts in a safe place.
- Lift the caliper off the rotor. It may be necessary to compress the piston slightly to clear the rotor. Use a C-clamp or a caliper piston tool to push the piston back into the caliper bore. Open the brake fluid reservoir cap to relieve pressure, but be careful not to spill fluid.
- Remove the old brake pads from the caliper bracket. Note their orientation for reference.
- Clean the caliper bracket and hardware with a wire brush and brake cleaner. Remove any rust or debris. Apply a small amount of anti-seize lubricant to the caliper bracket contact points where the pads slide.
- Install the new brake pads. Ensure they are positioned correctly and that any shims or clips are in place. Some pads have wear indicators that should face a specific direction.
- Reinstall the caliper over the rotor. Tighten the caliper bolts to the manufacturer’s torque specification. This is crucial for safety.
- Reinstall the wheel and lower the vehicle. Tighten the lug nuts to the specified torque in a star pattern.
- Pump the brake pedal several times to seat the pads against the rotor. The pedal should feel firm. Check the brake fluid level and top off if necessary.
After installation, test the brakes at low speed in a safe area before driving in traffic. Listen for any unusual noises and check for proper pedal feel. If anything seems off, re-inspect the installation.
Torque Specifications and Bed-In Procedure
Torque specifications are critical for brake components. Over-tightening can strip threads or warp components, while under-tightening can cause bolts to loosen. Always use a calibrated torque wrench and refer to the service manual for exact values. Common torque values for caliper bolts range from 20 to 80 ft-lbs, but this varies widely by vehicle.
After replacing brake pads, a bed-in procedure is often recommended to ensure optimal performance. This involves a series of controlled stops to transfer an even layer of pad material onto the rotor. The exact procedure can vary by pad manufacturer, so consult the instructions provided with the new pads.
A general bed-in procedure may include:
- Drive to a safe area with little traffic.
- Perform 5-10 moderate stops from about 30 mph to 10 mph, allowing the brakes to cool between stops.
- Then perform 3-5 harder stops from 40 mph to 10 mph.
- Drive for several minutes without braking to allow the brakes to cool.
During the bed-in, avoid coming to a complete stop with hot brakes, as this can leave uneven deposits on the rotor. After the procedure, the brakes should feel smooth and responsive. If not, the process may need to be repeated or inspected.
It is important to note that bed-in procedures are not universally required and some manufacturers may have specific recommendations. Always follow the instructions provided with the brake pads. Additionally, new brakes may feel less effective until fully bedded, so allow extra stopping distance initially.
Final Checks and Maintenance
After completing the brake pad replacement and bed-in, perform a final inspection. Check the brake fluid level and look for leaks around the calipers. Re-torque the lug nuts after the first 50 miles of driving. Test the brakes in a safe environment to ensure they are functioning correctly.
Regular brake maintenance includes checking pad thickness, rotor condition, and fluid level. Pads typically have a wear indicator that makes noise when replacement is needed. Inspect brakes at least annually or as recommended by the manufacturer.
If you experience any issues such as pulsation, noise, or reduced braking performance, have the system inspected by a qualified mechanic. Some problems may require specialized diagnostic tools or expertise. Do not ignore signs of brake trouble.
Remember that this guide is for informational purposes only. The author and publisher assume no responsibility for any damage or injury resulting from the use of this information. Always follow safety precautions and consult a professional when in doubt.